
How I Deploy Windows 11 for Student Use
Create a New Virtual Machine in Hyper-V

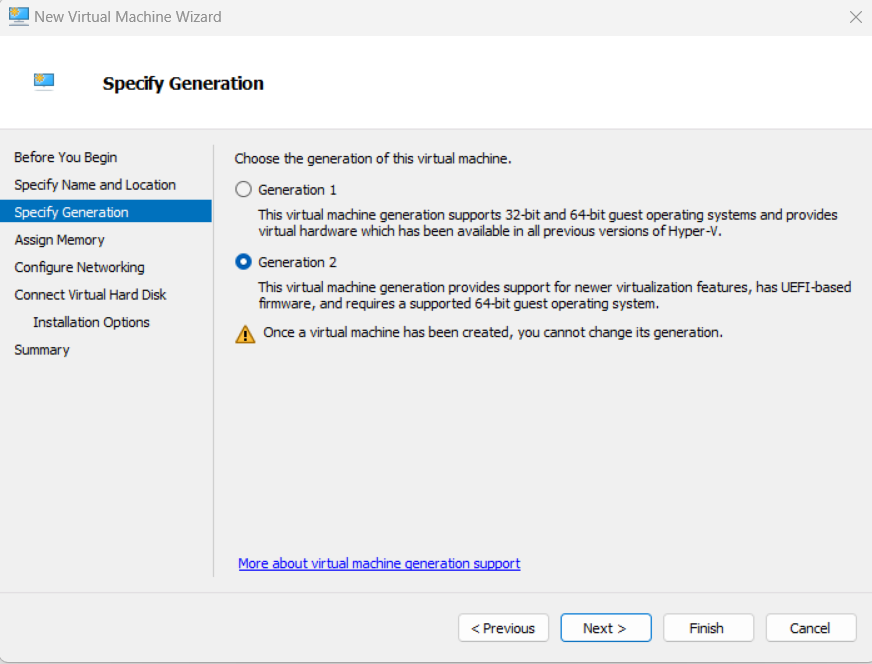
Select Generation 2 for UEFI
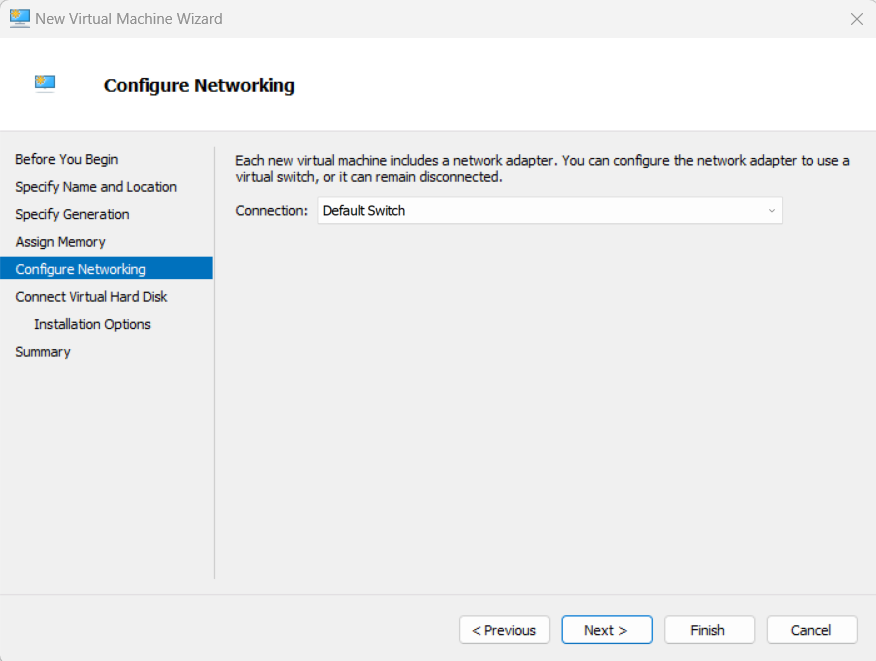
Set the Network Connection
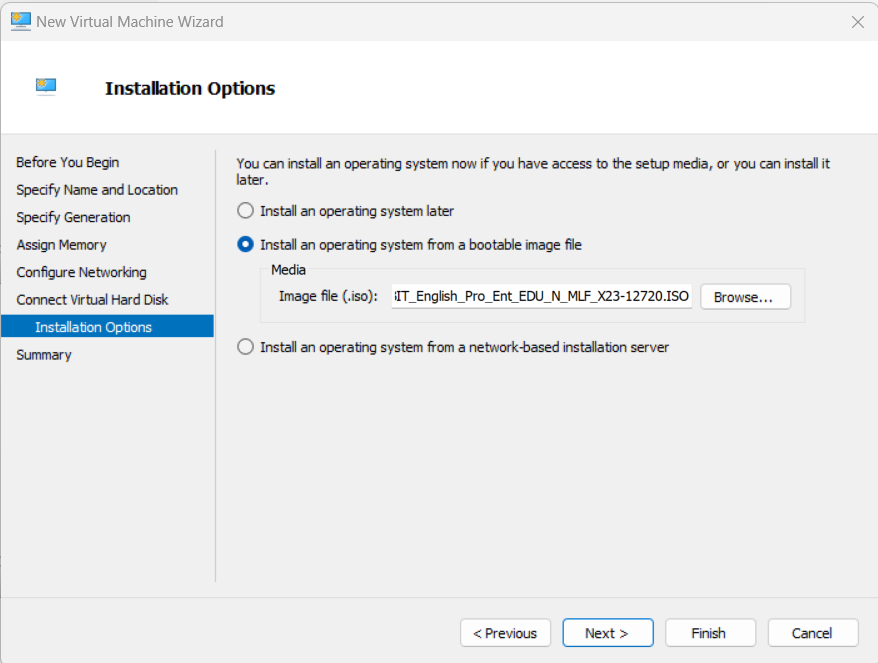
Add Installation Media
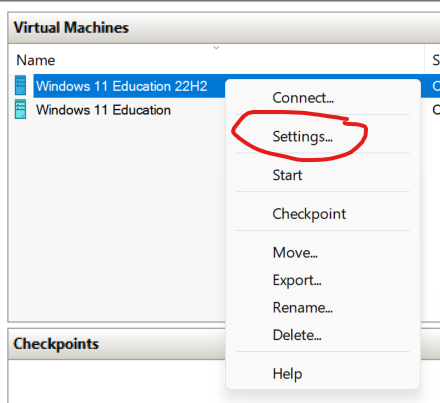
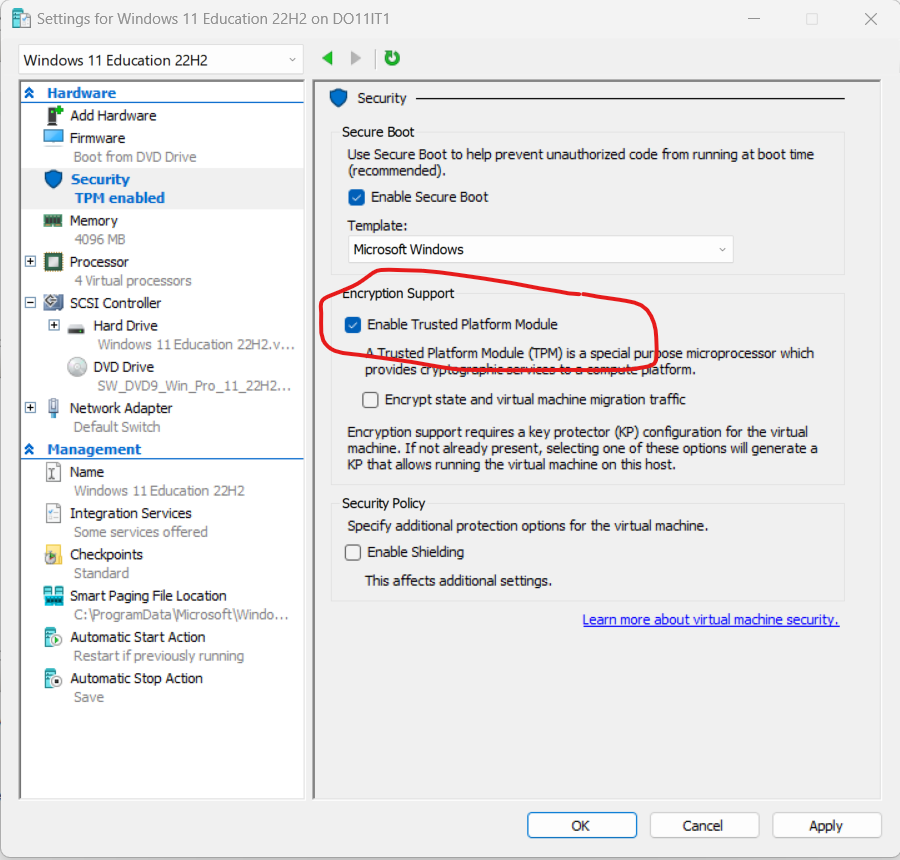
Right Click on the New VM and go to Settings
Enable TPM
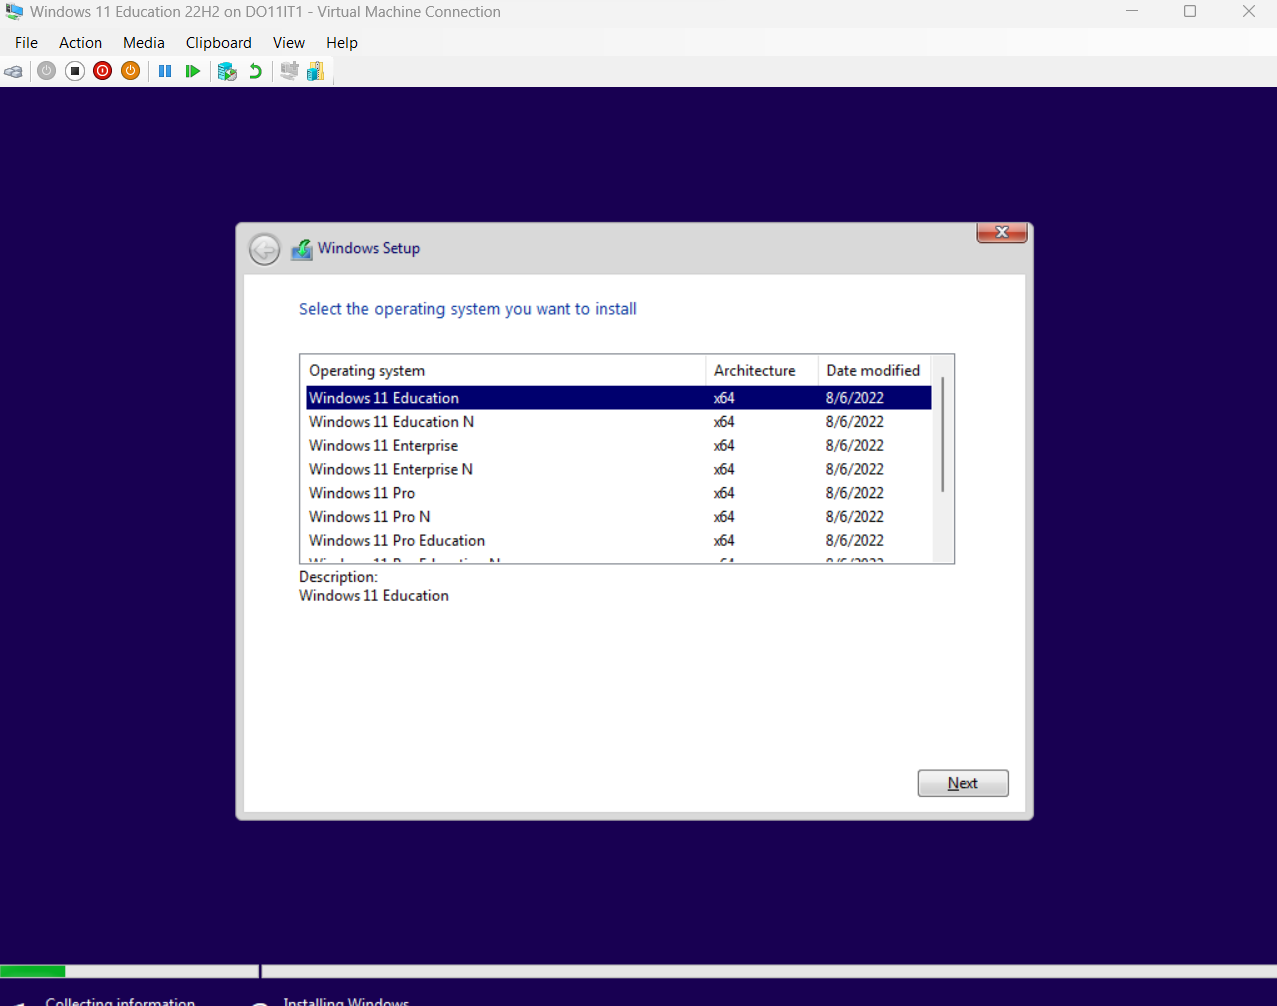
Select Windows Version to Install
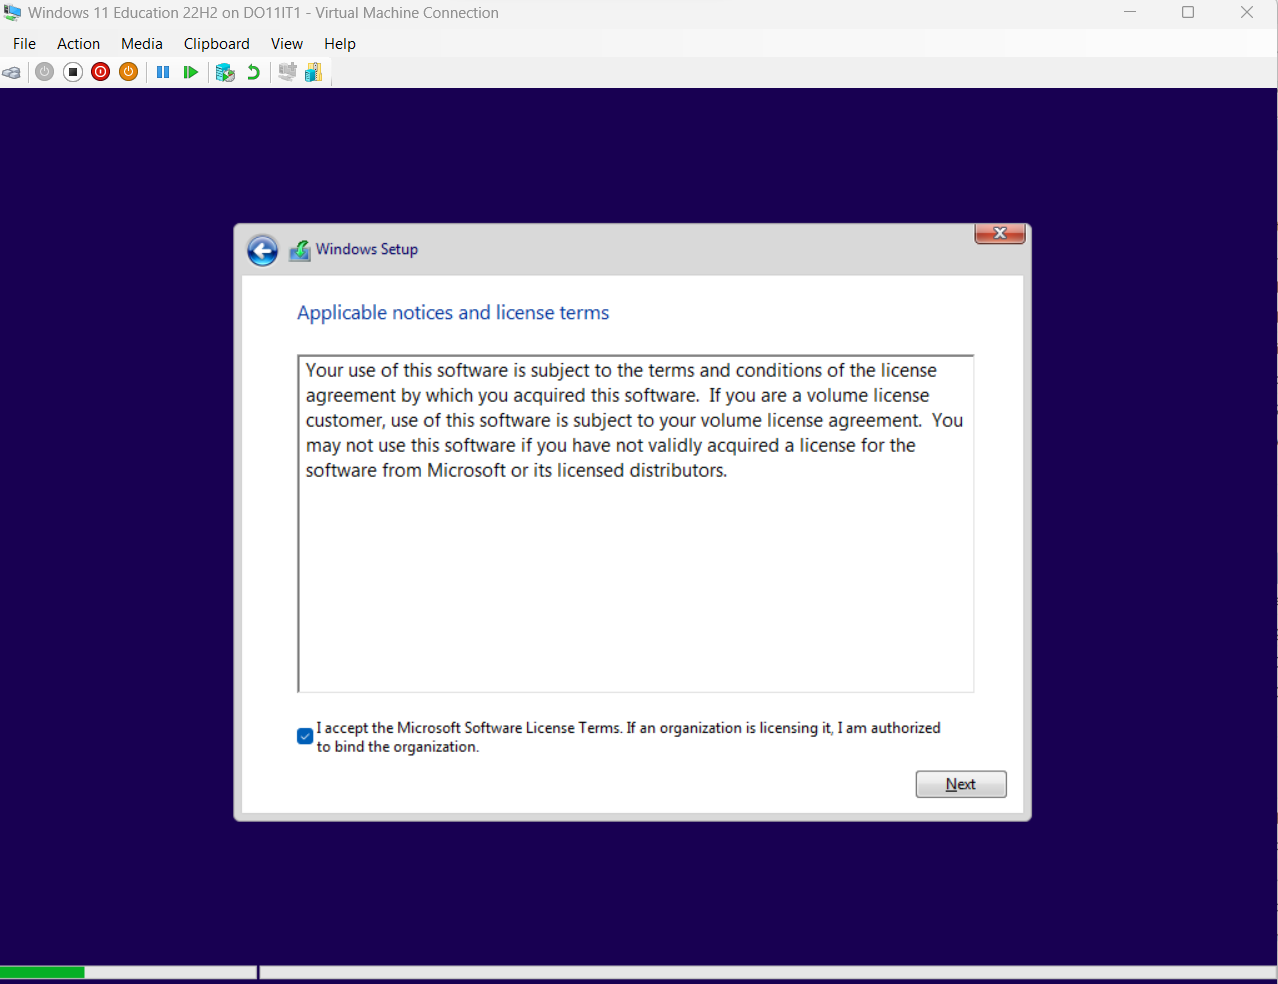
Accept the Terms
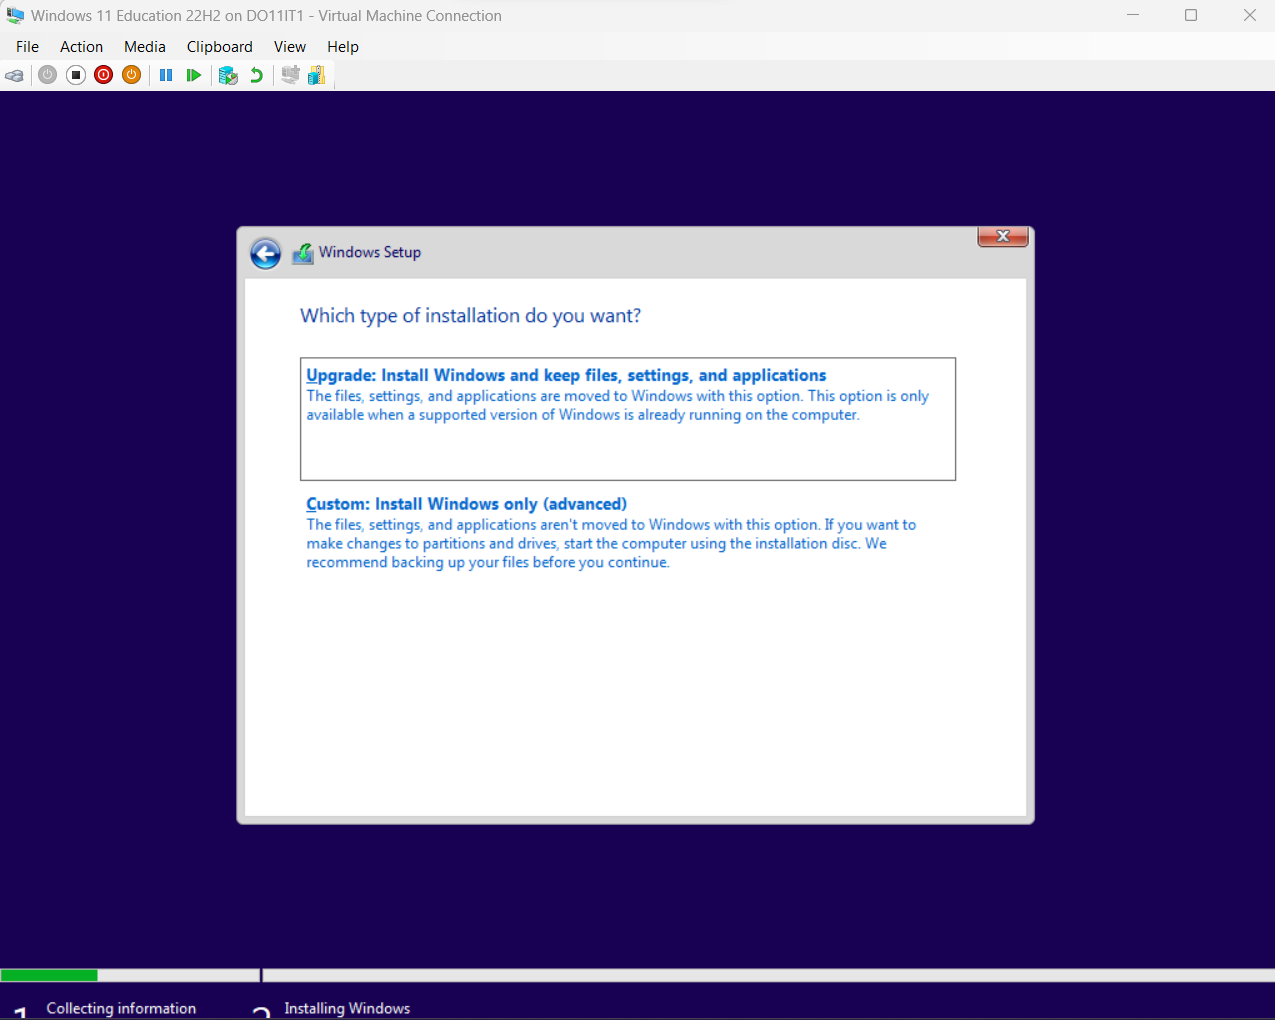
Choose Custom
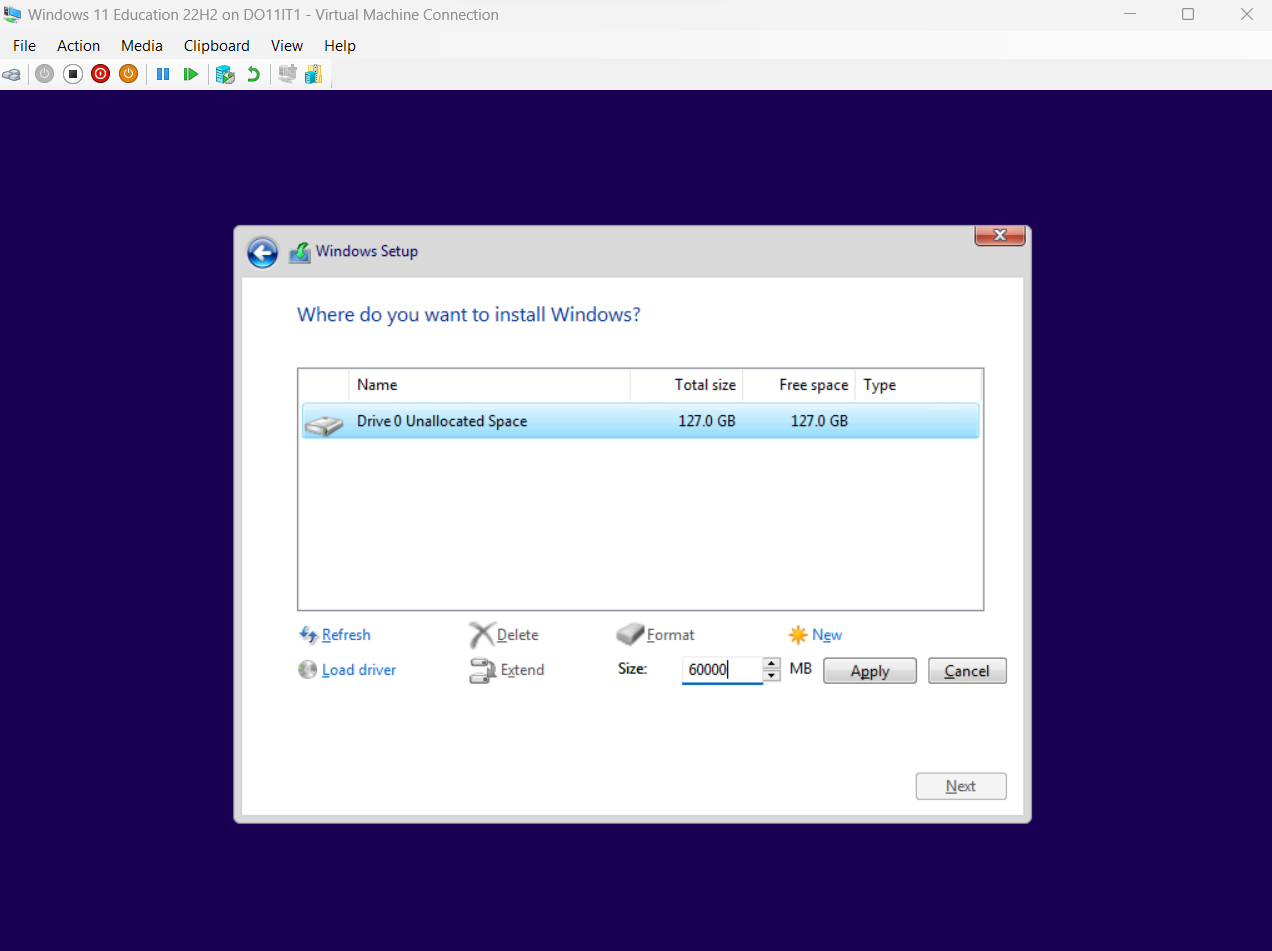
Create New Partitions using half of the space
Page 2 ↗